Showing posts with label The Coffee Beans. Show all posts

Saturday, July 25, 2020


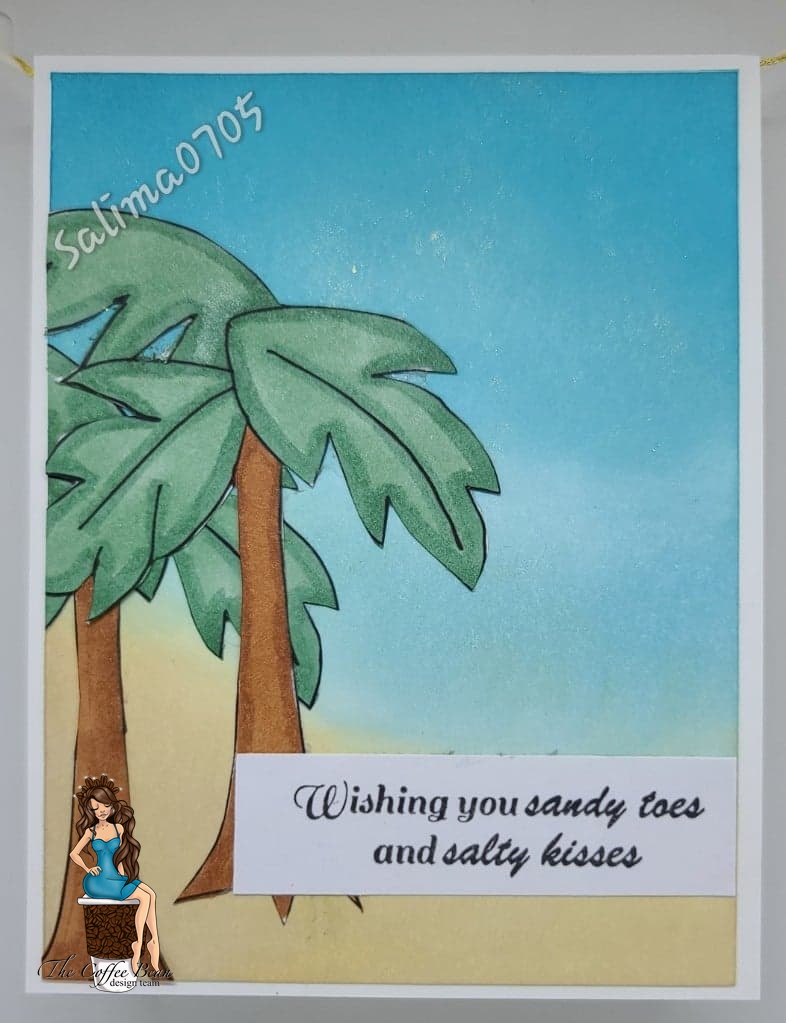
The beach is the best way to make someone feel better. The palm trees are digital image from Anne Ingram. I printed 2 and fussy cut them out. Colored then with Stampin Up Stampin Blends. Background was made with Distress Oxide Inks in the colors Antique Linen, Broken China, Tumbled Glass and Mermaid Lagoon. Sentiment is an old stamp from Crackerbox and Suzy Stamps.  A nice pick me up card.  

Tuesday, July 14, 2020

Anniversary Love!

Your soul mate can only be one of a kind, right?  This card will tell your significant other that, yep you are definitely one of a kind. As I was making this card, I thought that this would be an awesome anniversary card. But I soon realized that you can probably even give this card on your wedding day to your loved one. Of course because of my South Asian background, I chose bright and bold colors like red and gold to accentuate it. 
The Image is from our Lady Beans friend Annie Collins. You can find the image here: 
https://theladybeans.blogspot.com/2020/06/good-luck-best-wishes.html

This is a couple image, however I only used the groom on my card. The designer paper is something that I found in my stash, matted with black and then on a Whisper White A2 card base.  Random dots were placed with Nuvo drops for a little dimension to this card. My groom's "skirt" was colored with the same Nuvo drops and a paint brush. Hope you enjoy this card. Make sure you give some love to your "One of A Kind" 


Friday, June 26, 2020

Wedding Card

Hello - Helle here with my last post as Design Team Member of the Coffee Beans Design Team.

I chose to make the lovely Wedding Cake that Anne Ingram designed and that you can find in the Etsy Store and the flowers are designed by Annie Collins.


This time I did a mixture of print and cut and coloring in the image.

The cake, background and the card are all print and cut - papers are from BoBunny's Digi collection "Country Garden" 

I used Promarkers to color in the flowers and used a Glitter Gelly Roll pen for the flower centers.

Finally I found a fun adhesive pearl swirl for the cake to give it that last WOW factor.

Thank you for visiting. Thank you to the Lady Beans/The Coffee Beans for having me on their team. I've really enjoyed my time here and will be following you on the sideline from now on.

Friday, June 12, 2020

With the right shoes....

Comfortable shoes are necessary for a woman to be confident, the same as with great friends.
When friends are by our side and comfortable shoes on our feet, we are able to conquer the world.  Designer paper to match the Pink Pirouette card stock on a Whisper White A2 size card base.  The Shoes Digi file is from Anne Ingram. Of course, I had to make them bling with glitter after coloring them in Pink Pirouette Stampin Up Stamping Blends. Sentiment is from Skipping Stones Design Stamp Set.  Check out the Digi files from our Lady Beans in our Etsy Shop 
Please also visit https://salima0705.blog/ for more inspiration. 


Tuesday, June 02, 2020

Jesse Bear Celebrates Bonus Dad's Day

This cute little bear is named Jesse. He is a Digi stamp from Bugaboo Stamps Today Jesse is helping me celebrate Dad's Day for a special dad.  My real father passed away 23 years ago. I have Bonus Dad. He has been a great part of my mother's, my children's and my own life for the last 15 years. He has been very supportive for our lives. He has given much love to the family as if he always has been from the beginning.  The base is an A2 size card made from Whisper White card stock. Layered with Real Red and Whisper White and then Real Red again.  The last layer of Real Red was sprayed with Art Anthology's Colorations Spray in Gilded Gold to give it a little pop without girly glitter.  Jesse is colored with colored pencils in basic colors.  The sentiments were typed in word and printed out on Whisper White card stock since i really did not any stamp sets to commemorate Father's Day. Inside is a cute fun fold to make the sentiments pop that I just learned how to complete today.
The middle strip is 1 3/4 x 11 and score at 2 3/4 in, 5 1/2 in and 8 1/4 in.  Fold at the score lines to make a mountain fold.  Attach the strip to the bottom of the inside of the card right in the middle with strong adhesive.  then fold the strip down and add adhesive to the top portion of the folded strip.  Close the A2 size card to have the strip attach to the top. When you open the card, it becomes a pop up card.  The sentiments as I said before were hand typed by me, printed on Whisper White card stock and then cut out.  The Real Red backing for the sentiment are 2 1/4  in by 2 3/4 in.  I also sprayed them with the Colorations spray to give them a patterned look.  This card was very fun to make. Hope you enjoyed it as much as I did.  .

Sunday, May 31, 2020

Had To Make the Daffodils Again

Good afternoon every one.  I loved these daffodils so much that I had to make another card.  The sentiment is from Sassy and Crafty Healing Heroes free digital printable.  The Digi file for the daffodils can be found the Multi Crafter's Cafe Facebook page.  This card was made to bring cheer to someone who is working hard at smiling. During this pandemic, everyone is being affected. Whether they are dealing with having to stay at home with no source of income of are front line workers and are worried they may bring disease home to their loved ones. Everyone is worried and this is leading to more illness due to stress.  
Thank you for visiting my blog today 

Tuesday, May 26, 2020

Wedding Season Is Upon Us

The more elegant the wedding, the more elegant the cake.  This Digi file from Anne Ingram was sponged in Tim Holtz Distress Oxide Wilted Violet, Picked Raspberry, and Wild Honey Inks. The design on the cake is an image from Simon Says Stamp's Thankful Flowers stamp set, heat embossed in Caramel Cosmic Semi Transparent Embossing Powder from Sparkle and Sprinkle. Glitter Peel Off Stickers from Love from Lizi.  Sentiment from Simon Says Stamp's Congratulations stamp set, heat embossed in the same Caramel embossing powder.  The mats are gold mirror, peach colored, and designer card stock on top of Whisper White A2 card base.  Had a lot of fun making this card.  


Sunday, April 19, 2020

Our blessed month of Ramadan is coming in 5 days.  I cannot wait. I had to make a Ramadan wish card. These roses from Annie Collins were the best to display my sentiment from Altenew.  I colored using Stampin Up's Stampin Blends Markers. Everyone knows that Salima cannot live without bling.  The Roses have glitter on them to give them a little pop.  The image was cut out by my Scan N Cut and then layered on Basic Black card stock and printed card stock. The sentiment is from Altenew wishing the receiver "May This Ramadan Be Your Best Ever" stamped on a label with a gold outline and embossed in Gilded Embossing Powder from Brutus Monroe.  Gold sequins finish off this card. 


Monday, April 13, 2020

So Very Sorry


I could not resist. I had to make another card. These tulips are just so beautifully designed by our very own Annie Collins. Even though this is a sympathy card, the bright tulips on the blue background make it bright and cheery.  Tulips were colored by Stampin Up Stampin Blends.  Pool Party card stock layered on to matching designer series paper.  Tulips were embossed with gold embossing powder as well as the sentiment So Very Sorry.  Bling is Salima's middle name.. Added 5 gold sequins to finish the card 

Sunday, April 12, 2020

Mom's Day!

Hello everyone! I am back! I took a little hiatus.  As you all know, Mom's day is on the horizon.  The tulips were are a special image from Anne Ingram. I printed them and had my Scan N Cut do the work of cutting the images out.  The tulips were colored with my Stampin Up Stampin Blends Markers. Mom stamp is from the stamp set Mom's Clematis from Simon Says Stamps.  The background is designer series paper from Stampin Up and the bees are from Stampin Up's Paper Pumpkin from January 2020 "I'll Bee Yours".  Of course Salima has to bling, so I added a little embossing powder Brutus Monroe called Spring Sparkle and a little bling to the head of the bees.  Hope you enjoy this beautiful card

Thursday, March 26, 2020

Love Monsters

Hello everyone :-) Helle from My Creative Hideout has hijacked the blog ;-)

Today it's my turn to show a little DT project for the Coffee Beans Design Team 


This time I made a Flip Flap Card that I found in the Silhouette Design Store ID #136973 by Lori Whitlock and I used the cute Love Monsters digi Stamp.


I got the idea of the little monsters being caught inside the jar, ready to be given to someone special either as a Mother's Day card or maybe (in these crazy times) a Get Better Card. No matter the occasion, these darlings are sure to bring the message of love :-)

I used AC Cardstock, pattern paper from Doodlebug Design's Fairytales Collection and a piece of Acetate (doesn't show at all on this picture). The lid is made from Bazzill Bling Cardstock.

I colored in the stamp with Promarkers.


Now it's ready to be shipped of to someone special.

The Love Monsters digi stamp I've used is sponored by:


Thanks for joining me today - please leave a comment below if you like this card.


Tuesday, March 03, 2020

Bunny on Cloud Nine

Hello everyone - My name is Helle Bilde Müller of My Creative Hideout and I'm a new member on the Coffee Beans Design Team. I am very excited to be here and hope to bring something new and fresh to the team if possible.

Today I want to start out with not one…..not two…..but three projects I made with the darling digi stamp Easter Bunny Hot Air Balloon from Bugaboo Stamps.
For all three projects I used the trace and the offset options in my Silhouette Studio software and print and cut the images. Then I colored them in by hand.

First of is a cute 3D picture:
This cute picture is one I found in the Silhouette Design Store design ID #141563
I simply switched out the ballon with the digi stamp that I've colored in with Promarkers.

The frame is given extra dimension by using foam tape and the bunny plus the little piece of cloud is secured with 3D dots.

Next is an Easel Card:
This card is also one I found in the Silhouette Design Store Design ID #57245

The background is a print and cut that fits so well with the stamp.

I colored in the stamp with Sharpies and pop-dotted a small cloud on the right. 

A very easy and fun little card for someone special.

Finally I made a Gift Card Gift Bag:
This is also a Silhouette Design Store fil - Design ID #162508

This little bag is also dimensional as the bunny kinda floats inside in a little scene. Candy can be put in there too for more fun. Behind the bunny is a little insert/pocket for a gift card. The little cloud on the outside of the bag, is adhered with a pop-dot.

This time I also used Promarkers to color in the bunny and I do find these easier to work with.

So these are my three projects using the same digi stamp. 

This is deff some what out of my usual way of papercrafting but I do love a challenge. What do you think? Which one is your favorite?

Thank you so much for joining me today - hope to see you again next time 

Saturday, February 29, 2020

Hugs Koala Card

Hello Crafty Friends - Lady Beans Annie here with a sweet card using the
Mommy and Me Koala digital stamp. This adorable digital stamp was 
created by Judy Markowitz

The  digital stamp set can be purchase via 
The Coffee Bean Stamping Machine located in 
the Facebook group Multi Crafters Craft Cafe. 
Click photos, albums. Coffee Bean Stamping Machine

This is the card I created with the Mommy and Me Koala digital stamp
Materials Used:
Concord and 9th Die: Hugs and Hearts
Lawn Fawn Die: Grass Border 
Sizzix Die: Mini Flowers
Spectrum Noir Markers: CR2, IG2, IG3, BG2, BG3, and BG4
Nuvo Crystal Drops: Bubblegum Blush
Zig Wink of Stella Glitter Pen: Clear
Sticko Brand: Puffy Hearts
Imagine Crafts: Tear It Tape
Foam adhesive
Recollections Brand 110lb Cardstock: White 
Recollections Brand 65lb Cardstock: Pink, Green, and Gray
Recollections Brand: Vellum 
Recollections Brand Pattern Paper: Clouds
Accent Ultra Smooth 80lb Cardstock: White

I printed my image and sentiment onto white cardstock. I colored the image with my Spectrum Noir markers. Next, I fussy cut the image. I trimmed the pattern paper a quarter inch smaller than the gray cardstock. I then die cut the grass border, flowers, and sentiment.

I adhered the pattern paper to the gray cardstock. I then layered the Koala image used foam adhesive. Next, I adhered the grass and flowers. Followed by the sentiment. I added the card front to the base and finally adhered the little hearts.

Thank you for stopping by the blog today, I hope you found some inspiration!

Please join in on the fun at The Coffee Bean Challenge Blog and in the
 Facebook group Multi Crafters Craft Cafe. 

Thursday, February 13, 2020

Will You Be My First Mate Card

Hello Crafty Friends - I am here with Valentine's Day Card using the
 All at Sea with Love digital stamp set. 
This cute little rowboat was designed by Anne Ingram.

The All at Sea with Love digital stamp set can be purchase via 
The Coffee Bean Stamping Machine located in 
the Facebook group Multi Crafters Craft Cafe. 
Click photos, albums. Coffee Bean Stamping Machine

All at Sea with Love digital stamp set.

This is the card I created using the All at Sea with Love digital stamp set.
Materials Used:
The Coffee Bean Stamping Machine: All at Sea with Love digital stamp set
Distress Ink: Seedless Preserves
Distress Ink: Tumbles Glass
Distress Ink: Salty Ocean
Distress Ink: Fossilized Amber
Lawn Fawn Dies: Stitched Heart, Cross Stitched Rectangle,
Sun, Cloud, and Ocean Waves
MFT: Cloud Stencil
Spectrum Noir Markers: DP1, DP2, and DP3
Imagine Crafts: Tear It Tape
Foam adhesive
Recollections Brand 110lb Cardstock: White 
Recollections Brand 65lb Cardstock: Purple, Medium Blue, and Yellow
Recollections Brand: Vellum
Accent Ultra Smooth 80lb Cardstock: White

I printed my image and sentiment onto white cardstock. I colored the image with my Spectrum Noir markers. I then used the could stencil with Tumbled Glass ink on the white cardstock. Next, I die cut the panel, add the stitched heart to the background.

Then, I die cut the waves from the blue cardstock and the vellum. 
along with the sun and cloud from yellow and white cardstock. I adhered the waves to the card front panel, the image of the boat. I used foam adhesive on the boat and sentiment.

I colored the heart in with Seedless Preserves ink and adhered the sun and cloud. Next, I adhered the front panel to the purple cardstock and then the card base.

Thank you for stopping by the blog today, I hope you found some inspiration!

Please join in on the fun at The Coffee Bean Challenge Blog and in the
 Facebook group Multi Crafters Craft Cafe. 

Sunday, February 09, 2020

At Sea For Two Valentines Day The Coffee Beans Feb 2020


Welcome Back Friends,

Robin here with the The Coffee Beans sharing one of the first digi stamp sets available for purchase from The Coffee Bean Stamping Machine located at the Multi Crafters Craft Cafe in Facebook. Click photos, albums. Coffee Bean Stamping Machine


I began by blending ink on the front of my card. After I was happy with my sky, I die cut some clouds, the wave and punched iut the hearts.

I colored the boat in with color pencils. I pop dotted the wave, adhered the boat behind the wave. Ink the edges of the clouds, pop dot those for added dimensions. Add the heart and the sentiment for two.

Thank You for visiting  and as always I appreciate your kind comments.

Until Next Time......

Robin

Monday, January 27, 2020

Hello everyone. A Valentine's card made for that special mate in your life especially for The Coffee Beans blog page.  Simple but effective in letting that someone know he has the mast to the boat that drives you.  
Inside the card, is adorned with a beautiful sentiment requesting his presence.  This Digi file is from our lovely Anne Ingram and you can find the file in The Multi Crafters Craft Cafe in the album. Behind the boat is some designer paper just to make the card pop and I added the same paper inside the card under the sentiment.  There are some enamel hearts in the same colors.  

Monday, January 13, 2020

2020 The Year Of The Rat

Hello Crafty Friends - Annie here with a cute card for the New Year! 
In China, they are celebrating the Year of the Rat! 
 According to Chinese philosophy, the rat is considered to be signs of wealth and prosperity

The wonderful Janet Von Lone Trieschman created a fantastic digital and SVG file for the occasion.
The file can be purchased in her shop V-Studios

Winter SVGs image 0

This is the card I created using the Winter file from V-Studios


Materials Used:
Winter file from V-Studios
Love from Lizi Peel Off Stickers: Gold Glitter
Stickopotamus/EK Success Stickers: 2020 Numbers Gold
Ms.Sparkle & Co: Gold Stars
Jot Brand: Glitter Enamel Dots Gold and Yellow
Sakura Gelly Roll Pens: Gold, White & Black
Spectrum Noir Markers: BG1, BG2, BG3, BG4, CR2 & CT4
Imagine Crafts: Tear It Tape
Recollections Brand 110lb Cardstock: White & Black


Thank you for stopping by the blog today. I hope you found some inspiration!

Please visit my blog for more inspiration - Little Wings Creates

Please join in on the fun at The Coffee Bean Challenge Blog

Sunday, January 05, 2020

Year of The Rat 2020

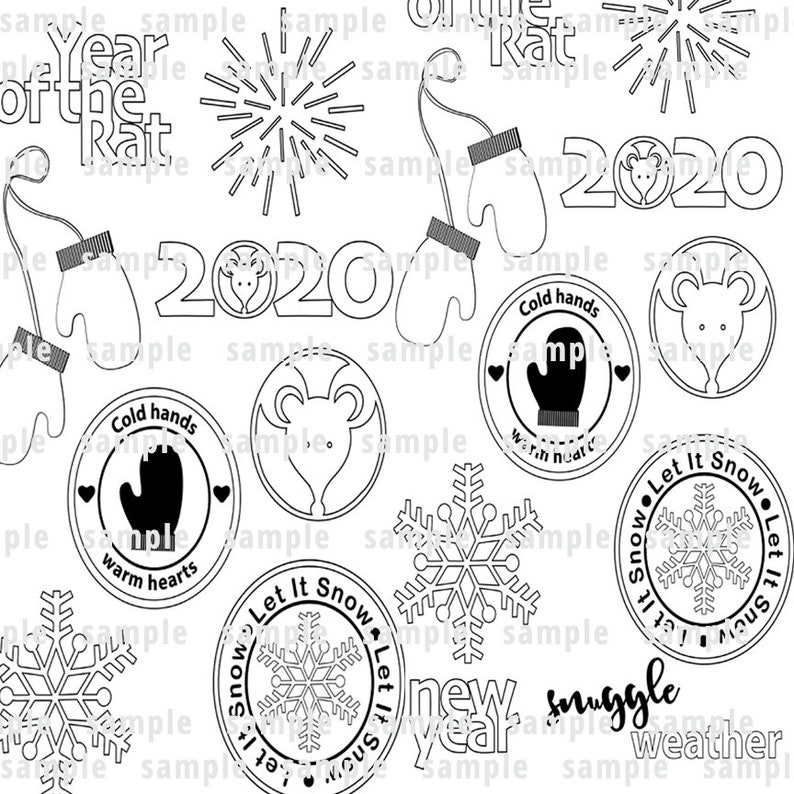
After being MIA, I have returned to The Coffee Beans blog. According to Chinese philosophy, the rat is considered to be signs of wealth and prosperity.  The year 2020 is The Year of the Rat according to the Chinese.  With the help of digi files from Janet van lone trieschman of V-studios, I was able to create this card.
I printed the digi images on Whisper White card stock from Stampin Up and colored them in with Stampin Blend markers in Light and Dark Calypso Coral, Light Rococo Rose, Light Smoky Slate, and Dark Basic Black. I then glued Nuvo Pure Sheen Glitter in Diamond on top of the rat and the words. The images were backed on Basic Black cardstock from Stampin Up and then Gold Glimmer Paper from Stampin Up.  Whisper White card stock base with Basic Black matting gives the images an extra pop. 
After making this card, I looked at the other images on this digi file and used them on other cards.  

Thank you for joining me again after my hiatus.  See you in the next blog post.

Thursday, December 05, 2019

LemonyFizz - Waiting for Santa Claus


Hi friends! Maria Pilar here with a special card. We are approaching December and today I bring a Christmas card for The Coffee Beans using LemonyFizz files. 

On the white card of my card, I pasted a Christmas paper from Graphic45 that is stamped with a snowball. On it I pasted my image of Santa Claus with the tree with double-sided tape. Then I added white glitter on Santa's hat to give it dimension.
At the bottom I stamped a stamp of Crackerbox&SuzyStamps. A few drops of Stickles and Liquid Pearl adorn the balls of the tree.

You can see more details in my blog by clicking HERE. 
I invite you to visit The Coffee Beans blog to see the creations of my teammates.
Do not forget to stop by the Etsy store of RodhaDesignStudio.

Sunday, December 01, 2019

From Our Home to Yours

     A day late and a dollar short.... No not really. Sorry everyone I have been a bit under the weather and was not able to post my blog in time. On the Design Team for The Coffee Beans, I made a card using this Digi file from Rhoda Design Studio.  Used Stampin Blends in Dark Cherry Cobler, Dark Real Red, Dark and Light Shaded Spruce, Light Pink Pirouette, and Dark Mango Melody to color this cute little Santa.  Background was with Distress Oxide inks in Tumbled Glass, Broken China, and Mermaid Lagoon.  Santa's hat and beard have glitter on them because Salima has to have some bling on my projects.  I used white craft ink and Versamark to stamp snowflakes in the background. I then used Iridescent Embossing Powder to stamp the falling snow.  Sentiment is from Neat and Tangled set called Bright Baubles.  Hope you enjoyed this cute little card.