Showing posts with label Lady Beans Helle Bilde Müller. Show all posts

Friday, June 26, 2020

Wedding Card

Hello - Helle here with my last post as Design Team Member of the Coffee Beans Design Team.

I chose to make the lovely Wedding Cake that Anne Ingram designed and that you can find in the Etsy Store and the flowers are designed by Annie Collins.


This time I did a mixture of print and cut and coloring in the image.

The cake, background and the card are all print and cut - papers are from BoBunny's Digi collection "Country Garden" 

I used Promarkers to color in the flowers and used a Glitter Gelly Roll pen for the flower centers.

Finally I found a fun adhesive pearl swirl for the cake to give it that last WOW factor.

Thank you for visiting. Thank you to the Lady Beans/The Coffee Beans for having me on their team. I've really enjoyed my time here and will be following you on the sideline from now on.

Wednesday, June 03, 2020

Jesse Boy Bear

Father's Day is this Friday here in Denmark. It's the same day as our Constitution Day....figures ;-) 

Well all Dads deserve recognition for their devotion, love and hard work but sadly I lost my Dad several years ago, so I will have to make due with sending a loving thought to where ever he might be.

I might not get to send him this card but I made it anyhow….maybe it more fitting for my kids to give to their Dad but no matter what - I made for Father's Day :-)

I used the darling Jesse Boy Bear Digi Stamp from Bugaboo Stamps:


This time I used the same technique as last  - the Print and Cut function. I thought it would save me some time.....LOL....NOT!

If I choose to do this another time, I need to make sure I have the right patterned paper I want because I spent a lot of time searching for some but found this at Creative Fabrica.

I wanted a watercolor look - so it looks colored in. 


I also made the shaped card with  my Silhouette Cameo. Simply by making an Offset of the stamp, duplicate the offset and flip the duplicate horizontally. Then I overlap the two offsets, weld them together and make a scoreline down the middle. Very simple and easy.

I did not make a sentiment to put on the card - simply in case I choose to use it for something else.

Happy Father's Day to all Dads out there and thank you so much for stopping by.

Sunday, May 03, 2020

Over the rainbow

Well not quite - more like over the music or ?

No I'm not entirely rambling. I'm referring to the latest project I just made using these cute stamps made by Judy Markowitz of the Lady Beans - both are available for purchase in the Multi Crafters Craft Cafe on Facebook.


I didn't have much time to make the project so I settled on making a card and combined the two stamps and the result is this:

I colored in the stamps with Promarkers and Sharpies and used a Glitter Gelly Roll on the hair in between the colors plus as dots in the eye. Then I added some colorful enamel dots here and there.

This will be perfect as a Birthday card for a little girl who loves unicorns.

Thanks for watching - as always, please leave me a comment below.


Sunday, April 26, 2020

Wishing Ewe.....

Hey hey hey…..Helle of My Creative Hideout here with a little wooly project that fits all kinds of celebrations.

The digi stamp I used this time, is sponsored by:
With Mother's Day coming up and lots of Birthdays etc. I thought it fitting to make a little box that can hold a chocolate bar. Who doesn't love to receive chocolate?

My choice fell on the 3D Mummy Candy Box designed by Jamie Cripps (Silhouette Design Store design ID #68840) but only the box itself, so I stripped it of all the unnecessary parts and added a
panel with the darling digi stamp Wishing Ewe.

The background on the panel is also one I found in the Silhouette Design Store design ID #22287 by Rivka Wilkins.


I colored in the stamp with Promarkers along with a grey Sharpie, a glittery Gelly Roll and a white Sharpie for the eye highlights.

I also added a few enamels dots for a little something extra.

Then I put the chocolate bare inside…..


….and it's ready to be given away to someone special.

Thanks for joining me today 

Did you like this project? Let me know in a comment below

Remember you can follow My Creative Hideout here:


Friday, April 03, 2020

Hanging Easter Eggs

Next week Easter begins and usually I decorate a bit for the Holiday but this year I can't find my stuff after the move. So I figured I would make a thing or two this year.

My DT assignment this time was these two Easter Eggs made by Annie Collins (these are available for purchase via Anne Ingram in The Multi Crafters Craft Cafe Albums) :


I printed two sets out and colored them in with my Promarkers and then used the Print 'n Cut setting on my Silhouette Cameo, to cut them out. 

Then I made an offset of the eggs and cut out two of each in AC Cardstock.

I found two cute Egg Doilies in the Silhouette Design Store design ID # 40140 designed by Megan Hardy and cut both out of Pearl Paper in pastel colors matching those of the offset cutouts.

Finally I glued the digi stamps onto the offset cutouts and glued one on each side of the Egg Doilies and voila....two new hanging Easter Eggs.

One in pastel purple/pink:

And the other in Pastel blue/Ocean Blue:

 These are pretty big but it's very easy to downsize them so they could hang from a branch in your Easter Decoration.

Thanks for joining me today - please let me know in a comment if you liked this project.
I hope you'll have a Happy Easter and remember to stay safe.


Thursday, March 26, 2020

Love Monsters

Hello everyone :-) Helle from My Creative Hideout has hijacked the blog ;-)

Today it's my turn to show a little DT project for the Coffee Beans Design Team 


This time I made a Flip Flap Card that I found in the Silhouette Design Store ID #136973 by Lori Whitlock and I used the cute Love Monsters digi Stamp.


I got the idea of the little monsters being caught inside the jar, ready to be given to someone special either as a Mother's Day card or maybe (in these crazy times) a Get Better Card. No matter the occasion, these darlings are sure to bring the message of love :-)

I used AC Cardstock, pattern paper from Doodlebug Design's Fairytales Collection and a piece of Acetate (doesn't show at all on this picture). The lid is made from Bazzill Bling Cardstock.

I colored in the stamp with Promarkers.


Now it's ready to be shipped of to someone special.

The Love Monsters digi stamp I've used is sponored by:


Thanks for joining me today - please leave a comment below if you like this card.


Tuesday, March 03, 2020

Bunny on Cloud Nine

Hello everyone - My name is Helle Bilde Müller of My Creative Hideout and I'm a new member on the Coffee Beans Design Team. I am very excited to be here and hope to bring something new and fresh to the team if possible.

Today I want to start out with not one…..not two…..but three projects I made with the darling digi stamp Easter Bunny Hot Air Balloon from Bugaboo Stamps.
For all three projects I used the trace and the offset options in my Silhouette Studio software and print and cut the images. Then I colored them in by hand.

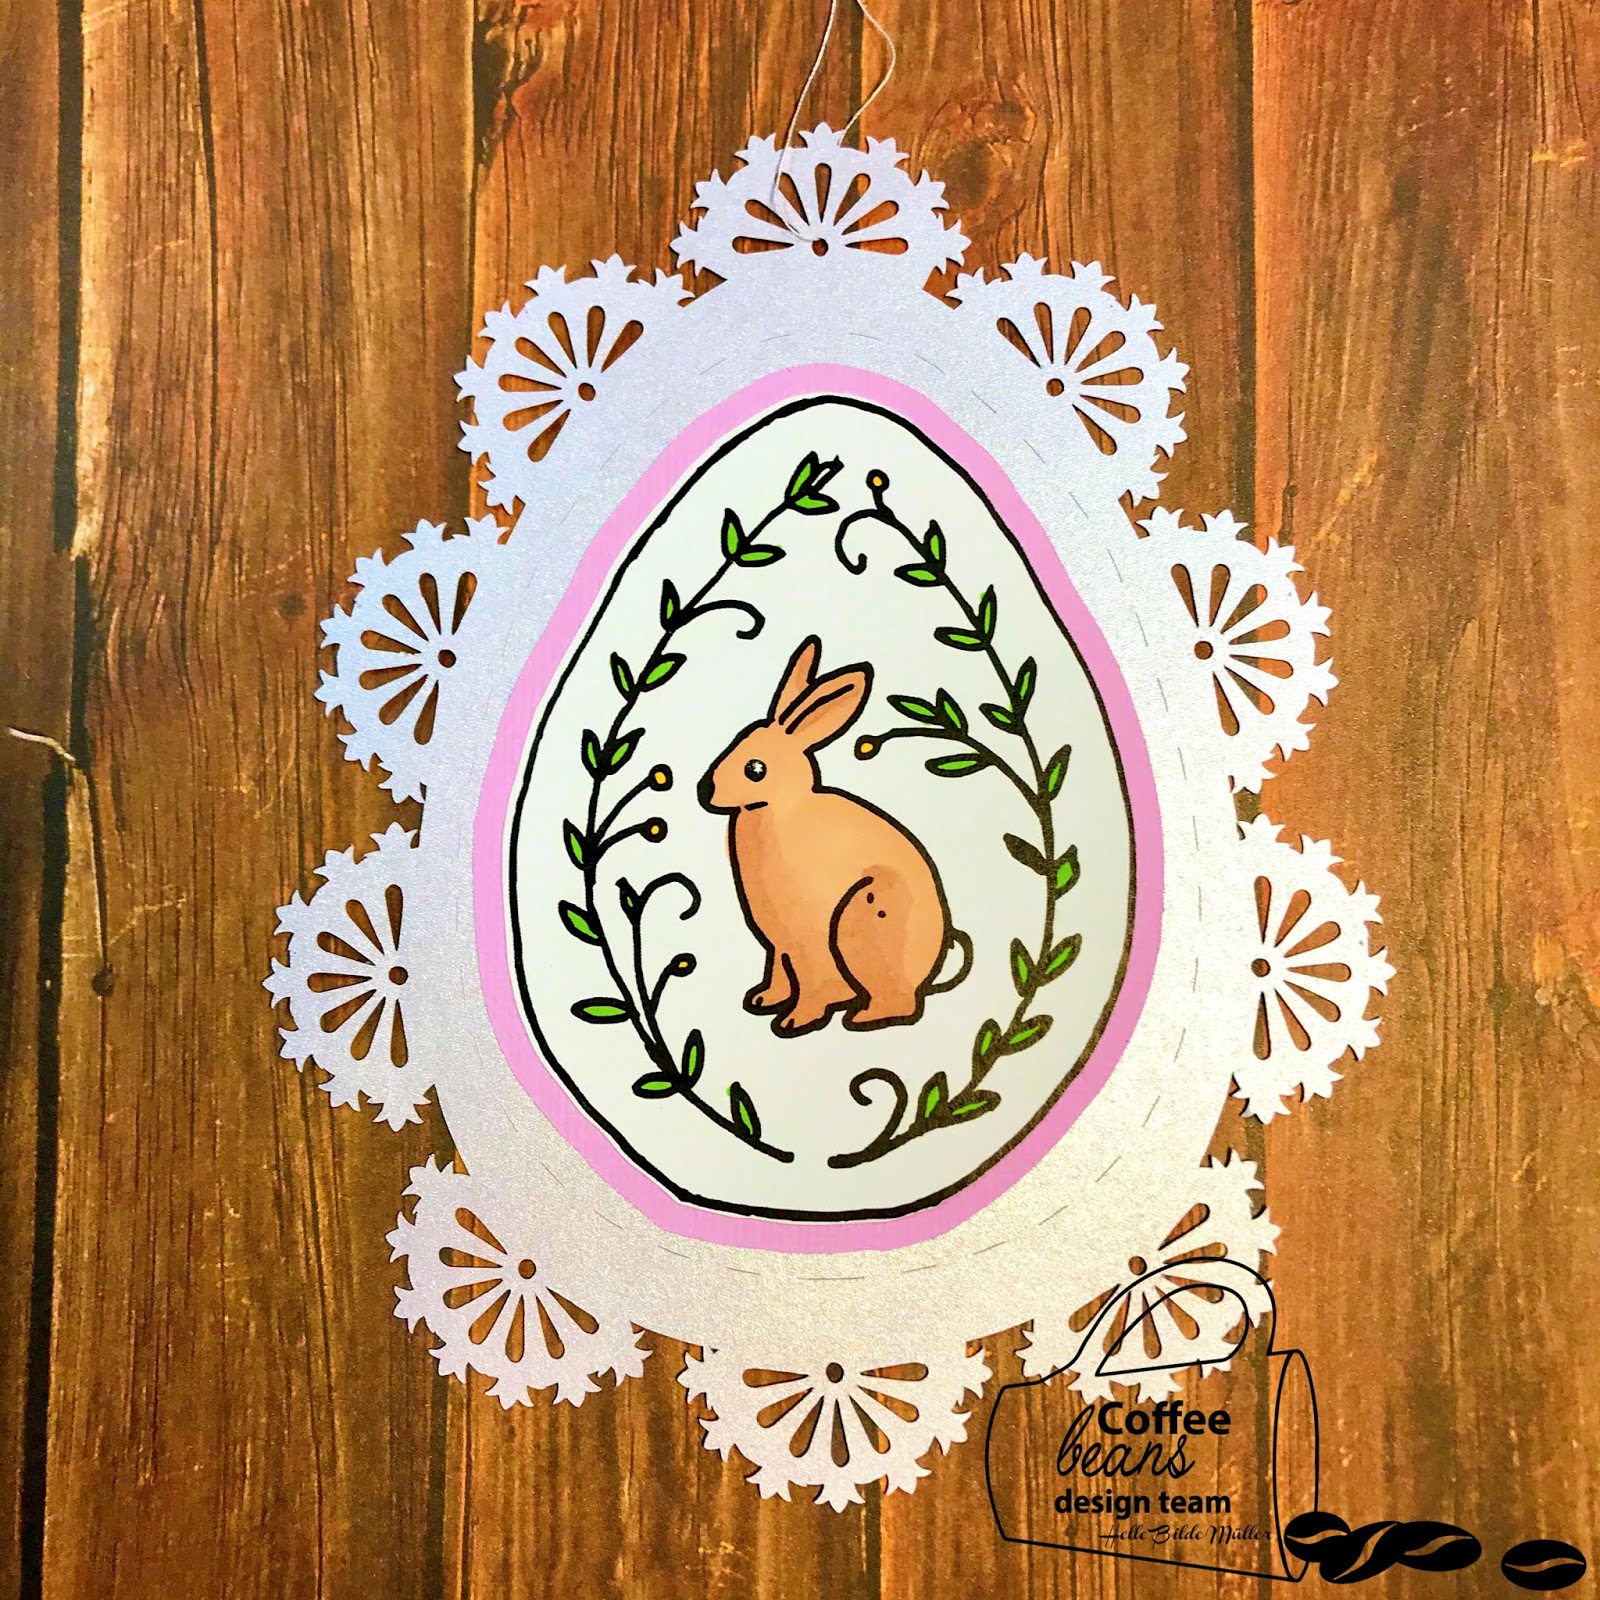
First of is a cute 3D picture:
This cute picture is one I found in the Silhouette Design Store design ID #141563
I simply switched out the ballon with the digi stamp that I've colored in with Promarkers.

The frame is given extra dimension by using foam tape and the bunny plus the little piece of cloud is secured with 3D dots.

Next is an Easel Card:
This card is also one I found in the Silhouette Design Store Design ID #57245

The background is a print and cut that fits so well with the stamp.

I colored in the stamp with Sharpies and pop-dotted a small cloud on the right. 

A very easy and fun little card for someone special.

Finally I made a Gift Card Gift Bag:
This is also a Silhouette Design Store fil - Design ID #162508

This little bag is also dimensional as the bunny kinda floats inside in a little scene. Candy can be put in there too for more fun. Behind the bunny is a little insert/pocket for a gift card. The little cloud on the outside of the bag, is adhered with a pop-dot.

This time I also used Promarkers to color in the bunny and I do find these easier to work with.

So these are my three projects using the same digi stamp. 

This is deff some what out of my usual way of papercrafting but I do love a challenge. What do you think? Which one is your favorite?

Thank you so much for joining me today - hope to see you again next time